 |
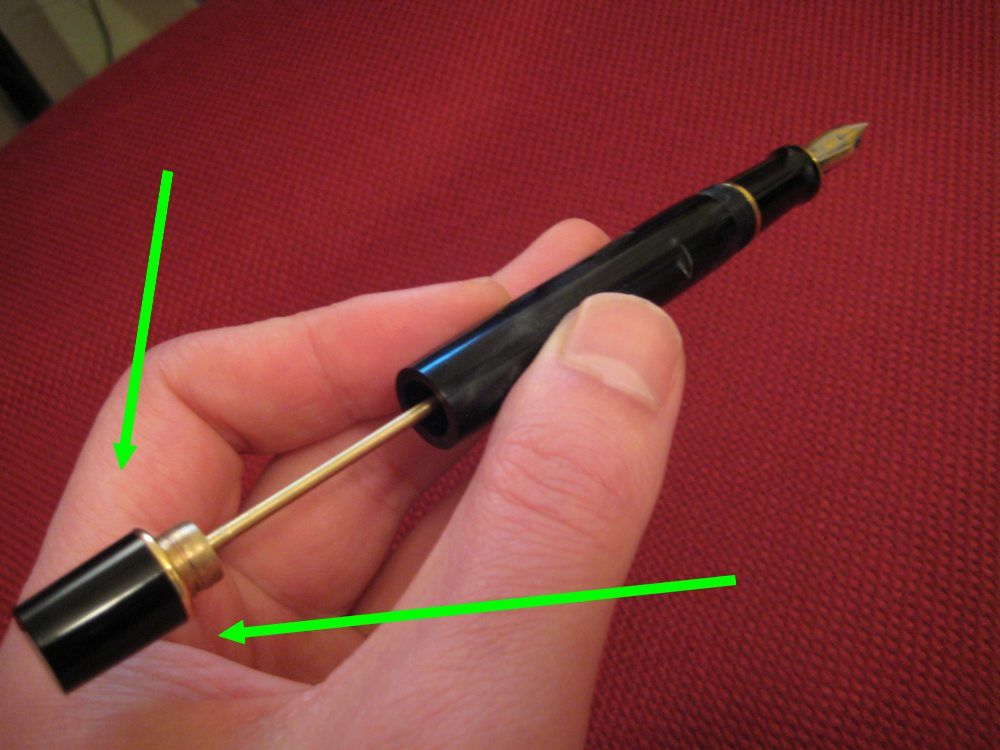
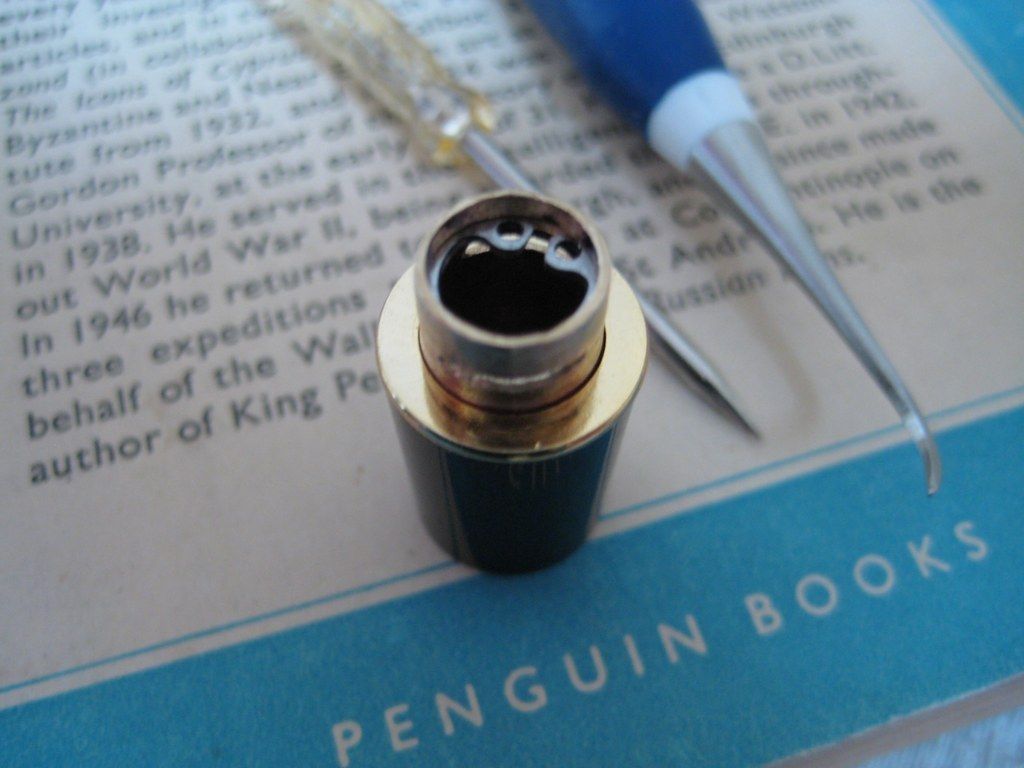
| Arrowed: The open blind cap, revealing the Kaigelu's plunger rod. |
Ambivalent about how to proceed with the blind cap, I found myself avoiding the whole subject till everything else was finished!
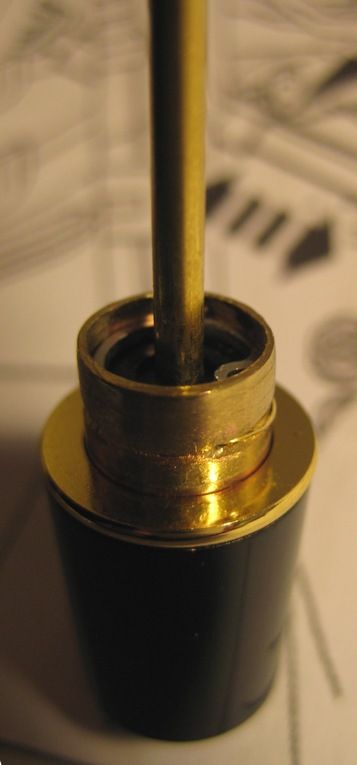 |
| A closer look. |
Instead, the Kaigelu's blind cap gets a (negligibly) lighter snap ring. The snap ring also allows for more tinkering in the future, I would like to eventually see a ink shut off valve control crammed in there along side it.
Now, I like the idea of a ink shut off valve. I feel less unequivocal towards the design favoured by every plunger filler manufacturer, in which the same threads work both the blind cap and the shut off valve. My gravamen here is the consequentially counter-intuitive habits required of the user (blithely says the guy making an unheard of snap ringed blind cap). Fill the pen, screw down the blind cap, then back off "a few" turns? Get used to writing with the blind cap ajar? I could live with it, but it's not my cup of Oolong.
As an alternative, I'd much rather the two functions were separated: the blind cap pulled straight up and down using the snap ring, and rotated to full left or right lock to extend and retract the shut off valve, using a ballpoint style twist mechanism. All that is very much just daydreams & doodles at the moment, so let's keep focus on the Kaigelu's crude snap ring arrangement as is.
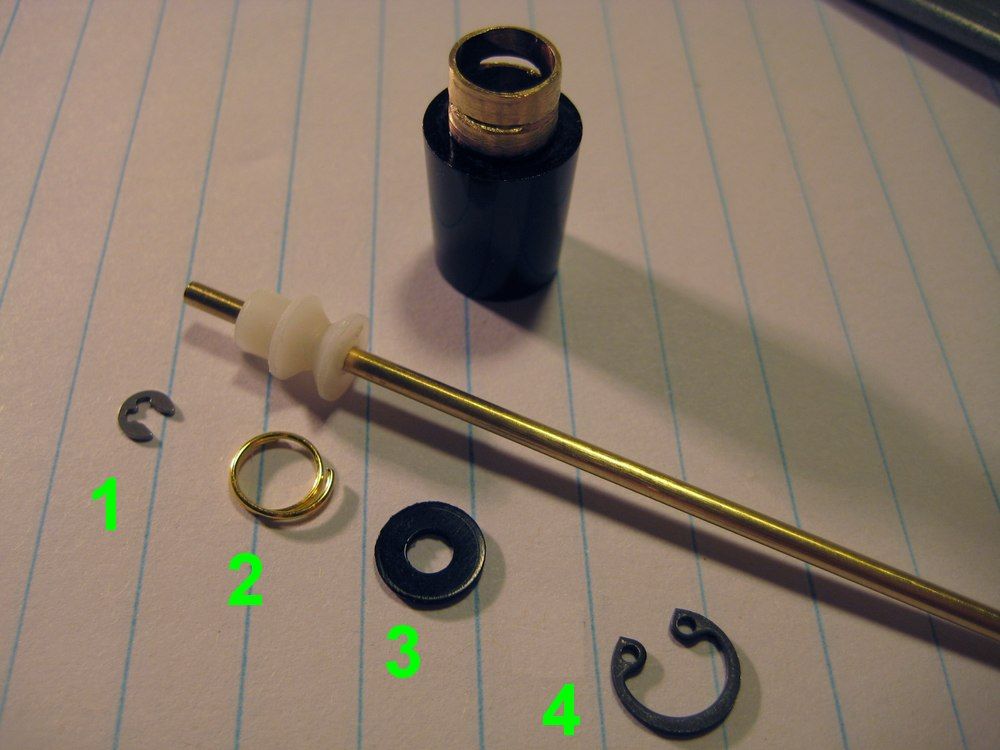 |
| The blind cap parts, before reshaping & fitting. |
To begin with, another motor pulley is used to connect the plunger rod to the blind cap, followed by this lot:
Part 1 - an external circlip, which sits in groove cut above the pulley, preventing it from sliding off the end of the rod.
Part 2 - a snap ring, which sits below the pulley and protrudes from the snap ring ports cut into the blind cap.
Part 3 - a plastic washer, which gives a flat surface for
Part 4, an internal circlip, which sits in a specially cut blind cap groove. This holds all the preceding parts inside the blind cap.
The finial's spigot has a recessed ring keyed into it from the factory, so I used that as a guide groove for the craft saw, cutting through the metal to create ports for the snap ring to project from. The dremel-style mini drill opened up these thin ports enough for the snap ring to fit through them.
 |
| "Even Rocky had a montage!" The blind cap's snap ring extends from these ports. |
The snap ring itself is just a gold plated jump ring, reshaped to a tall "C" profile with pliers.
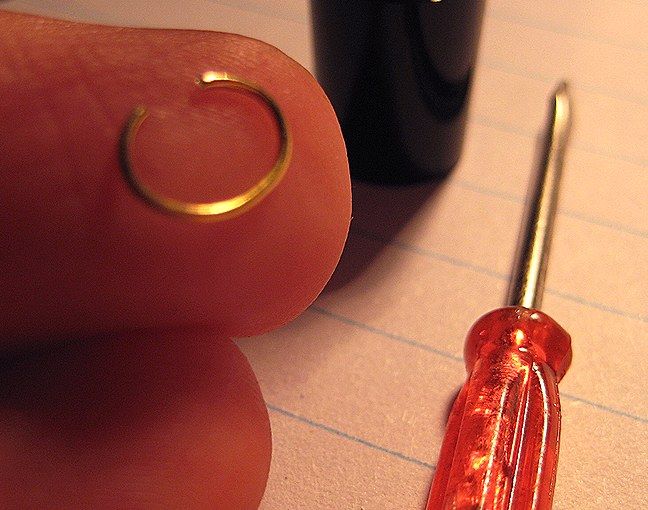 |
| About to test the jump ring. It needed to be bent quite a bit more than pictured above. |
Now, there are such things as internal circlips of less than 8mm diameter. In Australia. In China. But not in the UK! I had to grind down an 8mm circlip to suit. What a palaver! It actually wears down quite quickly using the roughest mini drill attachment.
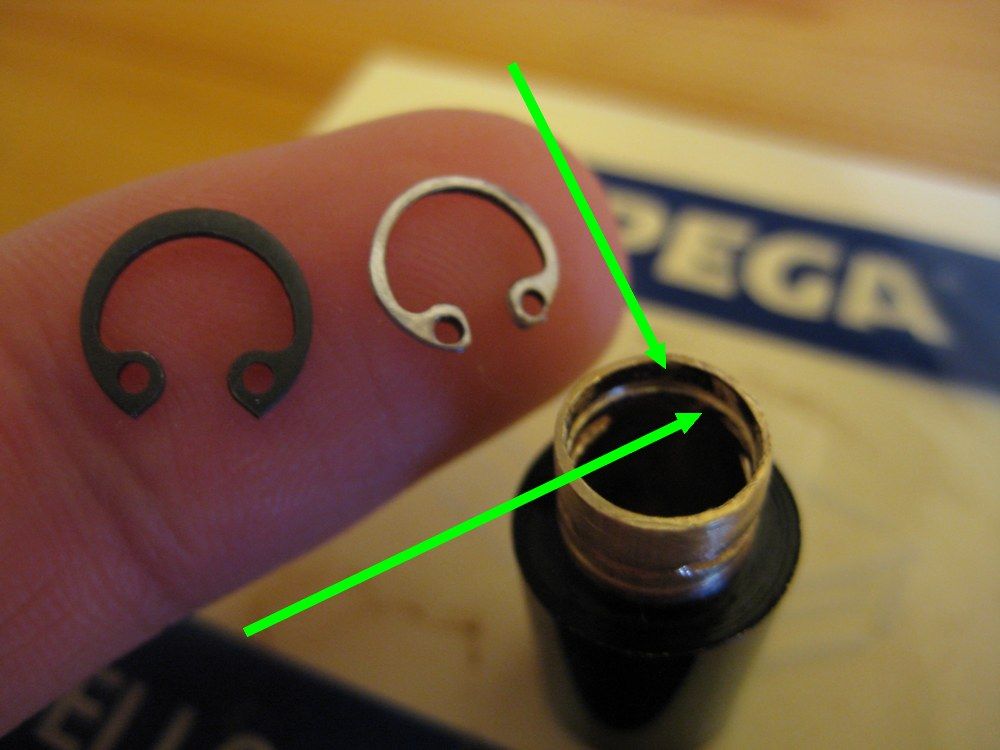 |
| Above: An 8mm spring steel internal circlip, a circlip ground down to size, and (arrowed) its groove cut into the blind cap. |
 |
| Does it fit? It fits! |
As you can see in the photo below, I didn't trust myself not to scratch up the plunger rod whilst making up the blind cap! Instead, I used an off-cut from the brass rod as a guinea pig, then transplanted the components over after testing. As it happens, all the wee circlips, washers and rubber O rings came in inexpensive packs of 5 or more too, which really took the stress off. With so many spare parts, messing any up was no big deal.
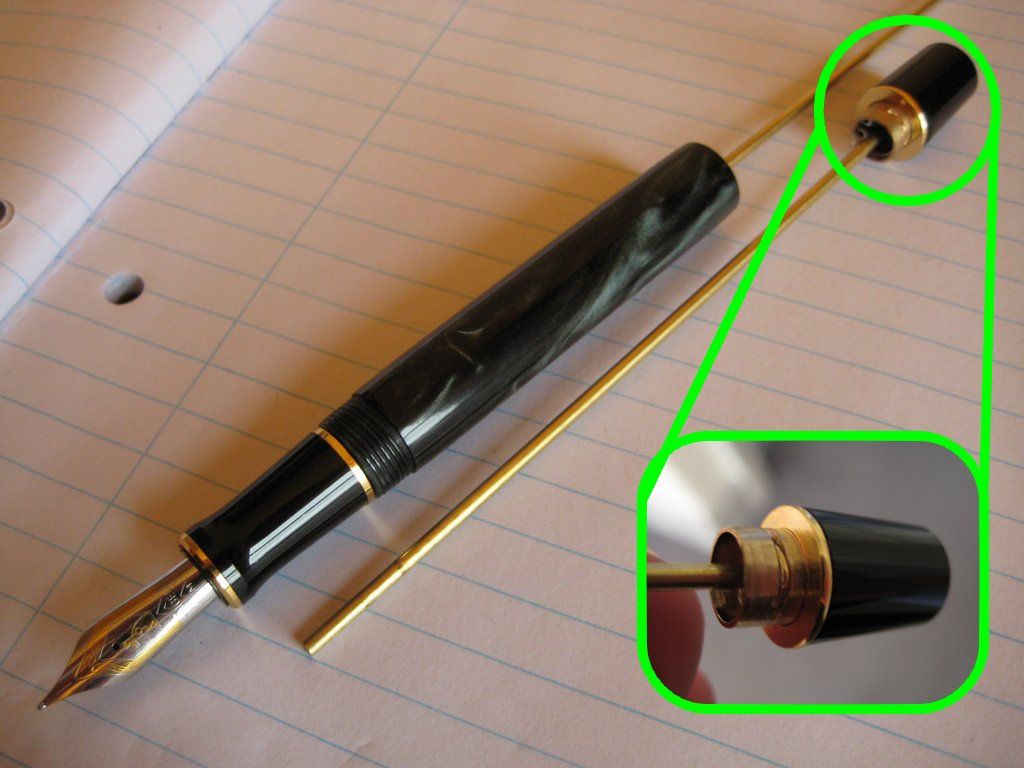 |
| The blind cap, ready to do its job. You can just make out its retaining circlip in the main picture, while the blow-up shows the snap ring that holds the blind cap to the barrel. |
Next up: Further Mindthots.
The final post documenting this mod wraps things up with a overview of the Vac316 build, what I would do differently in hindsight, thoughts on possible future revisions, other considerations, &c.
This simply amazing. Fantastic job, not only technically but also conceptually. Hats off, sir.
ReplyDeleteYou're very kind, thanks for dropping me a line! If I could find a hat I'd doff it to you.
ReplyDeleteInterestinng read
ReplyDelete